Imagine transforming your business communication by seamlessly switching to FiberConX VoIP—are you ready to unlock massive cost savings and enhanced reliability? Properly configuring your Grandstream ATA, such as the HT814 or HT818, is the crucial step that determines whether you enjoy crystal-clear calls or face frustrating disruptions. This guide reveals how to optimize your device’s settings—from network connections to SIP server details and NAT traversal—to ensure a smooth, stable connection. But what happens if you overlook these vital steps? The difference between a resilient, scalable system and ongoing issues lies in meticulous setup. By mastering this process, you not only future-proof your communication infrastructure but also unlock advanced features that streamline your operations. Are you prepared to make your existing hardware work smarter, faster, and more cost-effectively? The key lies in the details—and this guide shows you how to get them right.
Revolutionize Your Business Communications with FiberConX’s Advanced Phone Services
Discover how FiberConX Communications can transform your company’s communication infrastructure across Canada. Specializing in VoIP & IP Business phone services, FiberConX offers features like voicemail, IVR, Ring Groups, and voicemail-to-mail, ensuring seamless and professional connectivity. Whether you need a robust phone system for customer support or internal communications, their solutions are designed to enhance efficiency and customer satisfaction. For tailored solutions and expert support, contact FiberConX at Sales@FiberConX.com or call 1.800.961.6856. Explore their comprehensive Phone Service options today and stay ahead in the competitive business landscape.
Transform Your Business Communications with FiberConX and Expert ATA Configuration
Switching your business phone system to FiberConX VoIP can truly transform how you communicate. By moving from traditional landlines to internet-based calling, your business gains access to a more flexible, scalable, and cost-effective solution. FiberConX offers reliable VoIP services designed for businesses eager to cut costs while enhancing their communication capabilities. This shift not only lowers your monthly phone bills but also opens the door to advanced features like call forwarding, voicemail, and seamless integration with other business tools—making your operations smoother and more responsive.
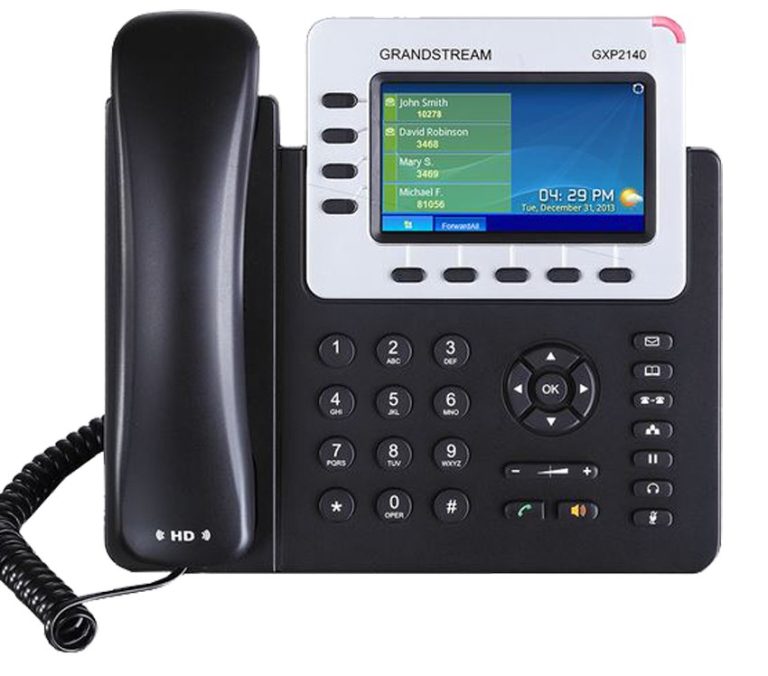
But simply subscribing to FiberConX isn’t enough. To unlock the full potential of these services, your Analog Telephone Adapter (ATA)—such as models like Grandstream’s HT814 or HT818—must be configured correctly. These devices act as the bridge between your existing analog phones and the FiberConX network. When set up properly, they ensure your calls are crystal clear, stable, and reliable, making the transition to VoIP smooth and hassle-free. Proper configuration maximizes your investment, allowing you to keep your current hardware while enjoying the benefits of modern technology.
Getting your ATA ready for FiberConX involves several key steps. First, ensure the device is powered up using the supplied power adapter and connected securely to a stable network via Ethernet. A reliable internet connection is crucial—any instability here can lead to poor call quality or dropped calls once you’re live. Next, gather all necessary account details from FiberConX, including the SIP server address, your assigned User IDs, and passwords. Having these ready streamlines the setup process and helps prevent errors that could delay activation.
Accessing the ATA’s web interface is the next move. You can do this by dialing a specific code—usually ***—on an attached analog phone, which prompts an automated message revealing the device’s IP address. Confirm the device is on the network by listening for the IP address or checking your router’s connected devices list. Once you have the IP, open a web browser, enter the address, and log in with the default credentials—typically ‘admin’ for username. For security, it’s wise to change the password immediately after logging in.
The core of the configuration involves entering the SIP server details provided by FiberConX. This step is critical; any mistake here can prevent your phone from registering properly. You’ll also need to adjust NAT traversal settings—most importantly, setting NAT to ‘Keep-Alive’—which helps your device maintain a stable, continuous connection with FiberConX’s servers. Proper NAT configuration is essential for clear, uninterrupted calls, especially if your network uses routers or firewalls that could interfere with VoIP traffic.
Once the SIP server information and NAT settings are in place, focus on configuring each FXS port. You’ll input the User ID and password assigned by FiberConX into the respective fields, give each port an identifiable name, and assign the correct profile—usually Profile 1. After saving these settings, the device should register with the network, indicated by a visual cue like a blue phone icon. With this, your ATA is fully configured and ready to connect your existing phones to FiberConX’s reliable, cost-saving VoIP system.
Essential Preparations for Seamless FiberConX and Grandstream ATA Setup
Before starting the configuration process, ensure you have everything needed at hand to make setup straightforward and hassle-free. Begin by powering up your Grandstream ATA with the included power adapter, then connect it securely to your network using an Ethernet cable. A stable and reliable internet connection is essential; any instability can lead to issues with registration, call quality, or dropped calls down the line. Confirm that your network is functioning properly—consider running a quick speed test or checking your router’s status—to avoid surprises during setup.
Gather the key details from FiberConX that will form the foundation of your configuration. These include the SIP server address, your assigned User IDs, and the corresponding passwords. Having these details ready prevents interruptions and mistakes, allowing you to input accurate information from the start. It’s also helpful to have a computer, tablet, or smartphone nearby, so you can access the ATA’s web interface once the device is ready. Preparing everything in advance helps keep the process smooth and minimizes frustration if you encounter any hiccups.
Next, verify that your device is properly connected and recognized on your network. Power on the ATA and listen for a dial tone on an attached analog phone, or check your router’s connected devices list to confirm the device’s presence. If the device doesn’t appear, troubleshoot by ensuring all cables are securely connected, the power supply is working, and the device is receiving power. Confirming the device is on the network before proceeding is crucial—without network access, you won’t be able to access the web interface to configure the settings.
To access the web interface, use the built-in IVR menu on your connected phone. Dial *** and wait for the automated voice to announce the device’s IP address. Make a note of this number; it’s your gateway to the device’s settings. If no IP address is announced, double-check your network connections, ensure the device is powered, and consider restarting the device to resolve any connectivity issues. Once you have the IP address, open a web browser on your computer or smartphone, enter the address, and log in with the default credentials—usually ‘admin’ for the username. Remember to change the password after the initial login for security.
Before making any configuration changes, back up the current settings if your device supports it. This step provides a safety net, allowing you to restore the device to its previous state if something doesn’t work as expected. Having a backup saves time and reduces stress if you need to troubleshoot later. Once logged into the web interface, locate the SIP server settings. Carefully enter the SIP server address provided by FiberConX, ensuring there are no typos or errors. Accurate input here is critical for successful registration and call setup, so double-check all details before saving.
Finally, pay attention to NAT traversal settings—these are often the key to stable, high-quality VoIP calls. Set NAT to ‘Keep-Alive’ or the equivalent option supported by your device. This configuration helps maintain a persistent connection between your ATA and FiberConX’s servers, especially if your network uses routers or firewalls that can interfere with VoIP traffic. Proper NAT setup prevents common issues like one-way audio or dropped calls, ensuring your calls remain clear and reliable. With these prerequisites completed, you’re ready to proceed confidently into the configuration phase, knowing your setup foundation is solid and prepared for seamless integration.
Unlock the Full Potential of FiberConX VoIP with Proper Configuration and Strategic Next Steps
Getting your Grandstream ATA properly configured for FiberConX VoIP isn’t just about making a quick setup—it’s about laying a solid foundation for significant savings and smoother communication. When you accurately input the SIP server details, optimize NAT traversal settings, and assign user credentials correctly, you’re ensuring your calls are stable, clear, and reliable from the start. This careful setup prevents common issues like dropped calls or one-way audio, giving your business the peace of mind that comes with a dependable communication system.
The true strength of a proper configuration lies in unlocking the full potential of FiberConX’s cost-effective VoIP services. By avoiding missteps during setup, you eliminate the frustration of troubleshooting call quality problems later. Instead, you can enjoy seamless integration, high-quality voice, and the flexibility to scale your system as your business grows. Proper setup transforms your existing hardware into a powerful, future-ready communication infrastructure that saves money and enhances operational efficiency.
Taking the time to get things right pays dividends in ongoing management. Once configured, your system becomes easier to expand or modify, whether that means adding new lines or adjusting existing ones. The clarity and stability achieved through proper setup mean less downtime and fewer disruptions—allowing your team to focus on what really matters: serving your customers and growing your business. This proactive approach to configuration sets the stage for long-term success.
Beyond the technical benefits, a well-configured ATA fosters confidence. Knowing your system is optimized for FiberConX’s reliable service encourages you to explore additional features—like advanced call handling or integration with other tools—that can further boost productivity. It’s about turning a simple setup into a strategic asset, giving your business a competitive edge through smarter, more efficient communication.
If any issues do arise after setup, troubleshooting becomes much simpler. Most problems trace back to small misconfigurations or overlooked settings. Double-checking your SIP server info, NAT configuration, and user credentials can often resolve issues quickly. Regularly verifying the device’s connection and registration status helps ensure your system remains stable and ready for action. This vigilance keeps your communication flowing smoothly, preventing small problems from escalating.
Finally, remember that this setup isn’t just a one-time task—it’s an investment in your business’s future. As your needs evolve, you’ll find it easier to adapt your VoIP system when it’s properly configured from the start. Whether you’re expanding your team, upgrading features, or migrating more lines, having a solid, well-understood foundation makes change simpler and more cost-effective. Taking these steps today means your business will be better prepared for tomorrow’s opportunities.
In short, a correctly configured Grandstream ATA is the key to unlocking the full benefits of FiberConX VoIP. It ensures your calls are clear, your costs are minimized, and your communication infrastructure is ready to support your growth. With this foundation, you can focus on what matters most—delivering excellent service and expanding your business—confident that your technology is working quietly behind the scenes to keep you connected.
To further enhance your system’s performance, consider exploring additional features and integrations that FiberConX offers. By leveraging these tools, you can optimize your communication setup for even greater efficiency and flexibility. For more information on how to maximize your VoIP capabilities, visit FiberConX VoIP services and discover the possibilities for your business.